 |
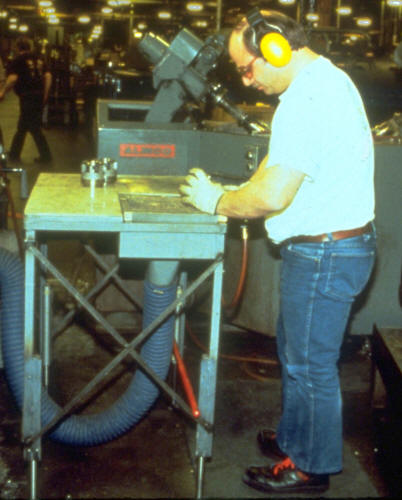 |
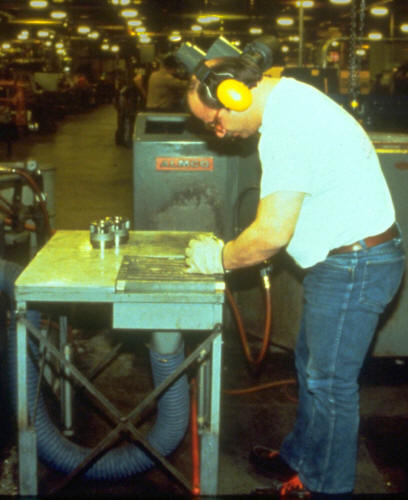
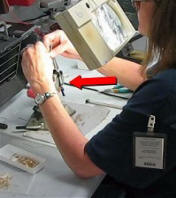
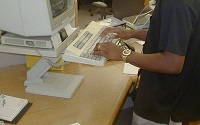
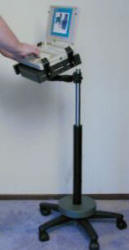
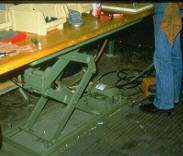
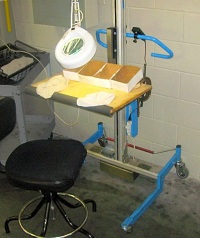
| Before — Bench too low | After — Extensions added to legs |
Principles affected
Related pages
Workstations:
- Standing platforms,
- Floor fixtures(especially pedestals)
- How to design a workstation (general guidance)
Background
Guidance for proper height
In the photos above, the bent back and severely bent neck indicate that the workbench is too low. Adding extensions to the legs raises the bench and as a result straightens the back and improves the neck posture (still bent, but much better).
The photos above also illustrate the basis of the “elbow height rule.” In the left photo, the work is 3 – 4 inches below elbow height. At right, the work is at about elbow height. Thus, locating the work at about elbow height tends to put the back and neck in good posture. Elbow height provides a simple rule of thumb that is easy to remember and apply in evaluating work height.
It should be emphasized that the issue is the height of the work, not of the workbench surface. If the item being worked on above was larger, then the bench surface may well have been satisfactory at its original lower height.
Visual needs and strength requirements must also be taken into account. If you need to see up close, putting the work above elbow height can help (good arm support may be needed, plus magnification might help). If you need strength, especially a downward push, it is usually better to locate the work lower than elbow height. Thus, determining the best height is not simply a matter of looking up average elbow height in a reference book. Optimal height depends largely upon the nature of the task. You may need to set up a mock workstation and use trial and error to identify the best height.
Adjusting for height
Since the height of individuals varies, providing adjustment is important. Adjusting the height of the work is easiest when one person works at an individual workstation. Techniques to provide such adjustability is the focus of this page.
In cases where the work itself cannot be adjusted, such as when several people work on the same assembly line or when working at a machine that is too big to move, then usually the only way to make height adjustments is to use standing platforms for the person.
Objectives
Adjust the work to fit the individual person, using the guidance provided in Principle 4 Heights i.e., usually elbow height but taking into account visual and strength requirements. Focus on the height of the actual work being performed, not the height of a bench surface.
Ideas and options
Benchtop risers
 |
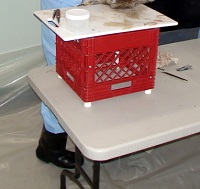 |
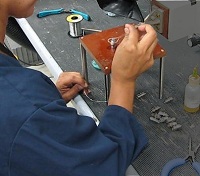
| Wildlife veterinarian at temporary field station | Milk crate used as riser — a creative quick fix |
One of the easiest ways to provide better working height is to use a “riser” or benchtop work platform. Almost everyone has done this at one point or another using a box or telephone books. The example above shows a temporary field station for an wildlife research task performed only a few times per year. In a more permanent work setting, a more professional-looking riser is probably warranted, but a milk crate is a good quick fix and it illustrates the concept. The point is that it is not necessary to raise the whole table — just using an inexpensive riser can provide a good work height.
 |
 |
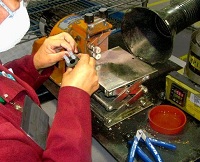
| Small riser | Fixture (behind hand) used to raise product |
These examples show a riser (left) that was made for a soldering task and a fixture (right) on an adjacent workstation that served the same purpose. Almost anything that raises the work piece can suffice.
 |
 |
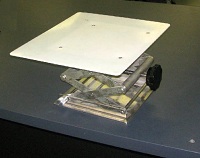
| Laboratory jack with added large surface | Laboratory jack integrated into a solder workstation |
Laboratory jacks are helpful if occasional minor adjustment is needed. The small scissors mechanism and knob provide for relatively easy changes.
 |
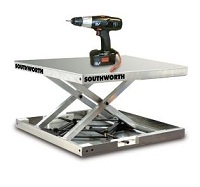 |
| “Taskmate”www.healthpostures.com | “Lift-Tool”www.southworthproducts.com |
Equipment that has been specially designed for this purpose is available on the market.
 Simple blocks or leg extensionsHeight-adjustable computer monitor stands can also be used as workbench risers. They are commonly available and can be used for this purpose.
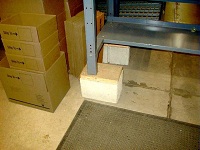 |
| Cement block under table leg |
Another easy way to raise a workbench is to place blocks under the legs. It may not look elegant, but it can be effective when a one-time change in height is needed.
Similarly, it may be possible to replace the table legs with longer ones or add an extension to the leg. The example at the top of this page shows an example of adding leg extensions. Again, this approach is suitable when a one-time change is made for a particular individual or task.
Set screws or slide bolt leg sections
 |
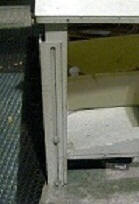 |
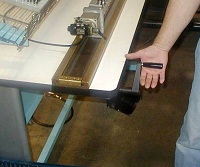
| T-handle set screw | Slide bolt leg sections |
When relatively frequent changes in the height of a work surface are needed, a comparatively inexpensive option is to use (a) an expandable leg in combination with (b) a set screw or bolt. Legs of this type are often fabricated with with two steel tubes of slightly different sizes, so that one slides inside the other. Usually a T-handle or similar lever is permanently attached to the set screw or bolt. In the photo above left, a set screw on only one leg is sufficient to provide stability. Above right, each leg must be adjusted separately.
The primary disadvantage of this approach is that it can be awkward to raise or lower the surface with one arm while holding the T-handle with the other. The best use is often when adjustment is needed for an employee new to that particular workstation, or at most, when a shift changes.
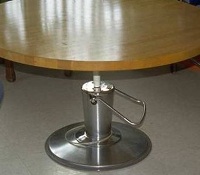
Pedestals
 |
 |
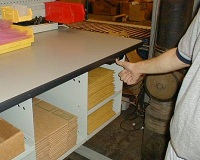
| Barber stool base | Die cart used as workstation |
One of the great advantages of using a pedestal as the base for a workstation is ease of adjustment. It is mechanically much easier to raise and lower a single column than it is two or four legs. Barber stool bases are the most common example of a pedestal-based “workstation.” These bases are available without the stool on-line.
Die carts often use a single pedestal, but sometimes have additional side posts for increased stability. (See also die cart as workstation and pedestal examples in floor fixtures).
 |
 |
| Hand crank pedestal base (www.alimed.com) | Electric version |
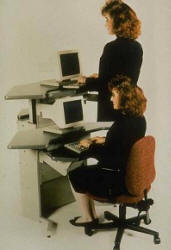
Pneumatic spring lifts
 |
 |
| Pneumatic springs for desk (left) and pedestal (right) | |
Pneumatic springs provide the height adjustment in most office chairs in use today and can also be used for work surface adjustment. All that is required for adjustment is to pull a latch, then gently lift up or push down. See sit/stand.
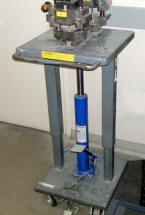
Hand cranks
 |
 |
| Hand crank adjustment | Retrofit legs (www.ergosource.com), powered version also available |
Hand cranks connected to hydraulic cylinders provide a common approach to height adjustment. The cost is somewhat less than powered versions and can be appropriate in situations where the need for adjustment is infrequent.
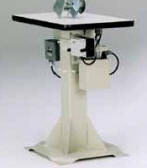
Powered adjustment
 |
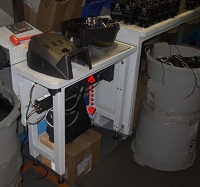 |
| Push button | One segment of work bench is motorized |
The workstations above are powered with electric motors and can be operated at the push of a button. The right-hand example shows a portion of a workbench that is powered adjustable, since only one task needed height adjustment and there was no point in powering the entire bench. Powered versions tend to promote use more than hand crank versions. Common vendors includewww.iacindustries.com, www.ergosource.com, and www.alimed.com.
 |
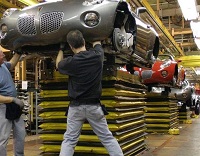 |
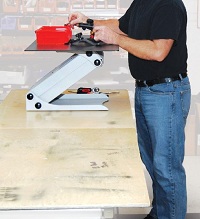
| Standard scissors lift as base for workbench | Cars on scissors lifts on assembly line (accordion skirts around scissors mechanism to cover pinch points) |
The above examples show hydraulic scissors lifts being used, one for a single workbench and the other for a car assembly line.
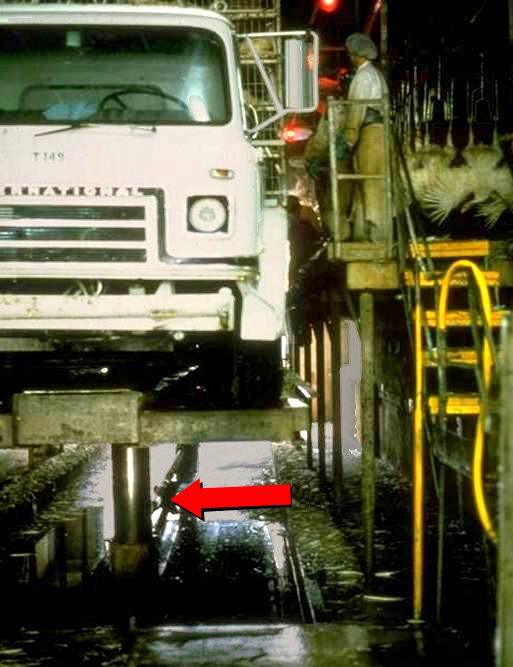 |
| Poultry truck on large hydraulic cylinders |
This example shows a poultry truck being unloaded at a processing plant. These trucks have multiple levels of cages for the birds that must be unloaded by hand. A tall work platform is constructed at a height for unloading the top level of cages. Once the top level is unloaded, the truck is raised so that the next highest level is at good working height. The truck continues to be raised until the lowest level of cages are empty.
Reminder: What makes it ergonomic?
 |
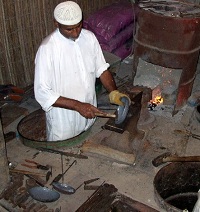 |
| Stump | Recessed oil barrel |
A stump puts the anvil at a good height for this North American female blacksmith (lower than elbow height is appropriate here to enable more force). Arab blacksmith — There is a shortage of stumps on the Arabian peninsula, but a surplus of oil barrels. So the blacksmith leaves the anvil at floor level and recesses himself into the ground.
A workstation does not require height adjustment to be ergonomic. Indeed, an adjustable-height workstation that is used incorrectly may be very un-ergonomic. Anything that positions work at the proper height for the person and the task is ergonomic, even if it is as simple as a stump for an anvil.
Mock workstation
 |
| Using lifter-transporter for mock workstation |
Often, the most practical way to determine the best height for a given task is to create a mock workstation using some piece of highly adjustable equipment as a base. In the photo above, a lifter-transporter was borrowed for a few hours so that several employees could try working at different heights.
To be sure, it would be ideal to make all the workstations being planned highly adjustable. But to keep costs low, it can be helpful to narrow the range of adjustability that may be needed.
Furthermore, it can be helpful to get buy-in and input from employees to try a new concept before purchase decisions are made. Upfront involvement can increase acceptance and usability.