 |
| No flow, unnecessary motions, wasted time |
Background
It is common to neglect this final stage of handling. The common practice is to bring the parts close to the point of use and then leave it to the employee to determine how best to handle them. The result is excessive bending, reaching, and movements that both waste time and contribute to wear-and-tear injuries.
Note: There is an overlap between this topic and the main category of material handling. There is no standard way to make this distinction, but in general, material handling can be thought of as moving materials from one workstation or area to another. The topic here is movement of materials within the workstation.
Objectives
The underlying principles are to: minimize hand/arm motions, minimize reach, optimize overall working position, and minimize force.
Good rules of thumb are: (1) minimize the distances that parts need to be moved, (2) present the parts in the same orientation as they will be used, and (3) slide the parts as much as possible.
Ideas and Options
Design for sliding
 |
| Slide surfaces to and from machine fixture |
It is almost always better to slide an object than it is to pick it up and put it down (see slides). The example above shows inexpensive steel surfaces that allow sliding to and from a fixture in a machine. The slides support part of the load, thus reducing strain on the hand and arm, yet still allow easy movement.
Note that the slide surfaces shown above are slanted to compensate for different heights. Equalizing the heights would constitute a good additional improvement, but the slides as currently designed are better than picking up the full weight of the load.
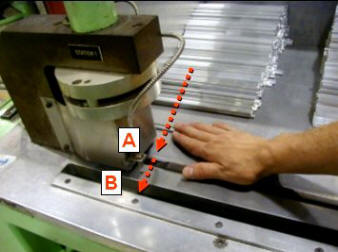 |
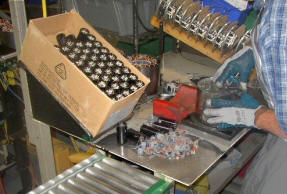
| Sliding lightweight parts |
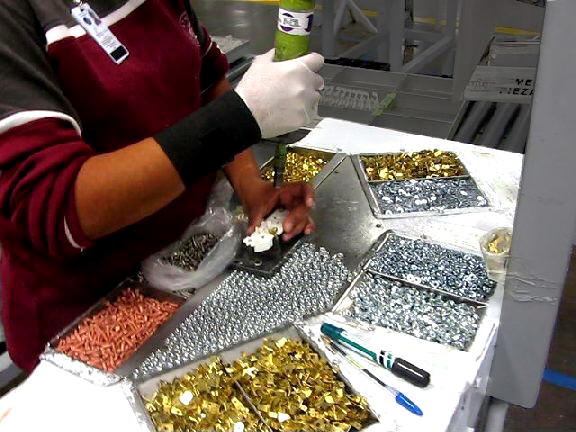
The photo above shows an excellent example of parts handling within an individual workstation. The parts are staged close at hand and at exactly the height needed. When the part is slid into slot “A,” pushing down activates the machine. After the machine cycle is completed, an automatic ejector raises the part back up to the surface. Then the part is slid to slot “B” which drops to a tote on a shelf underneath. The employee can slide the part from start to finish without ever needing to pick it up.
 |
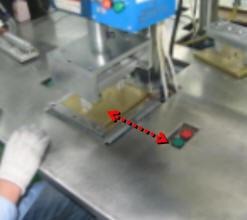 |
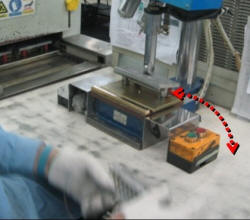
| Before: Machine placed on top of surface | After: Machine recessed into surface |
The primary design issue is putting everything at the same height. Usually this is fairly simple and most workstations can be retrofitted.
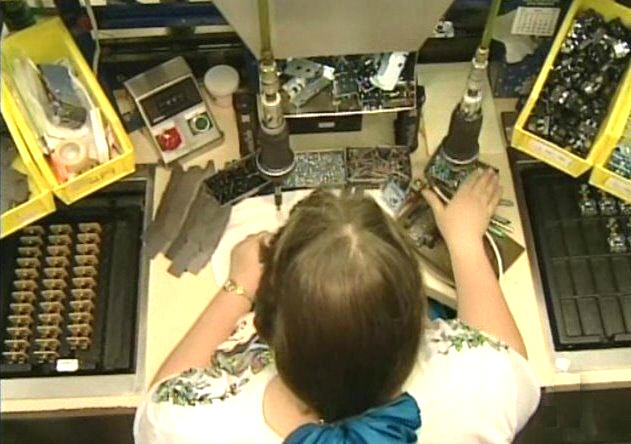
The example above shows a small machine of a type that is almost always placed on top of work surfaces, thus requiring extra motions to pick up and put down twice (once to load and once to unload). The machine and control buttons were recessed to create a flush sliding surface. This operation is part of a high volume production line and this simple change ultimately yielded an astonishing 176 hours time savings per year.
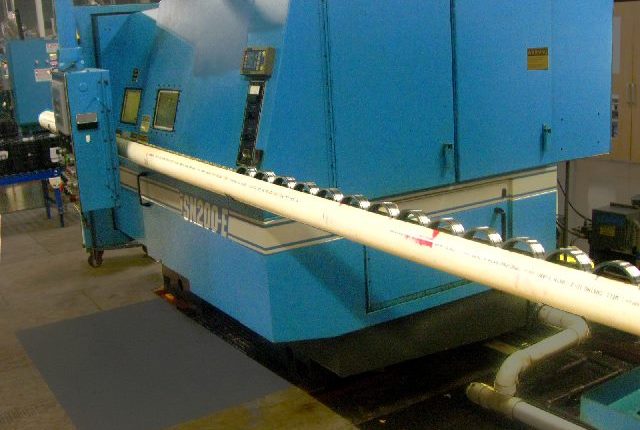 |
| PVC slide between two machines |
This example shows a PVC half-pipe placed between two machines, which eliminated several steps: (1) bend and reach to place the part in a container, (2) forklift truck to move the container to the next machine, and (3) bend and reach to load the part in the next machine. The slide still requires an arm motion to load and unload, but the distances, time, and range of motion are less.
Minimize distances, horizontal AND vertical
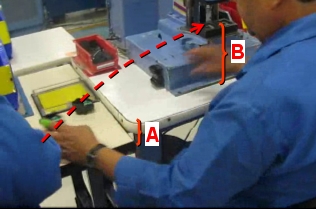 |
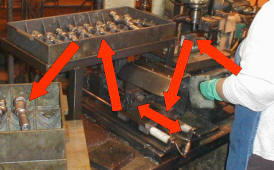
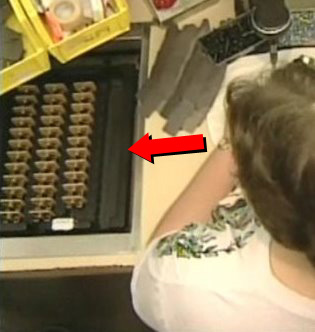
| Arrow indicates excess horizontal movement. Brackets A and B show height barriers. |
Anything that minimizes horizontal and vertical distance traveled can reduce wear and tear on employee arms as well as reduce cycle time. The photo above shows a bench top machine that is positioned too distant and too high relative to the previous operation. The arrow indicates excess horizontal movement. Brackets “A” and “B” show the height differences.
In this example, about 30% of the work cycle was devoted to moving the part, which is to say, a significant waste of time as well as risk for a shoulder disorder. The machine should be positioned (1) as close to the previous operation as possible (as consistent with proper clearance between the two employees), and (2) at a height so that the fixture is level with the position of the part when picked up by the employee.
Tracks and built-in conveyors
 |
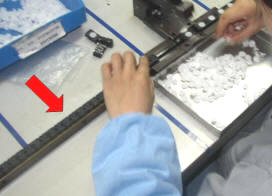 |
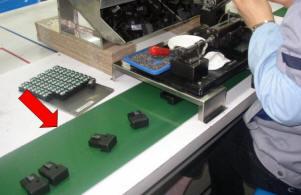
| Moving conveyor integrated into workstation | Strip of channel (U-shaped) steel |
Conveyors and slides can be built into the workstations to move parts efficiently from one workstation to the next. This use of conveyors is common when the parts are heavy, but has advantages for lighter parts as well. Note that this application is somewhat different from using a conveyor as a workstation.
In the example above left, the conveyor is flush with the work bench surface. Small work platforms bridge the conveyor. The advantages of this design is that the same conveyor transports parts to several employees along the same bench. This disadvantage is the minor height difference created by the platform bridge.
The example above right shows a simple U-shaped channel used to move parts from one station to the adjacent station. The parts are manually pushed along the channel. In this case, the parts are very light and the channel is completely filled, so adding a part at one end pushes out a part at the other end to the next employee.
| Two examples of tracks (note how track bridges gap in workbench in far side of left photo) | |
Tracks are similar to conveyors and slides, but incorporate a fixture to hold the item being assembled. Tracks are helpful when the item itself cannot be moved by itself on a conveyor or slide. The disadvantage is that the fixture must be returned to the beginning of the line, either by carrying or with a return system. (Often the return system is more elaborate than the track itself.)
Note in the photo above left how the track bridges a gap in workbench (far arrow).
Parts stands and bins
 |
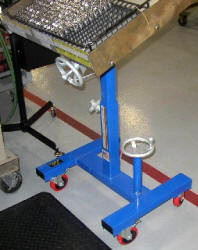 |
| Inexpensive tilted parts stand | Mobile, highly adjustable stand |
A common — but rapidly disappearing — problem is placing boxes of parts in locations too far away from the point of use and flat on a workbench, thus creating a long and awkward reach. Inexpensive stands can be built into the workstation adjacent to the point of use and tilted for fast and easy access. Mobile parts stands are also commercially available, some of which are highly adjustable so that they can be positioned immediately adjacent to the point of use.
 |
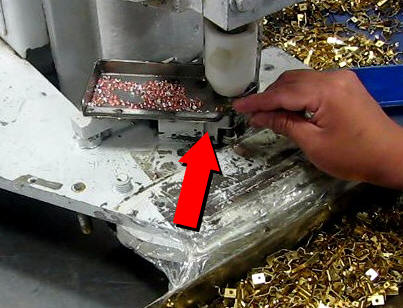 |
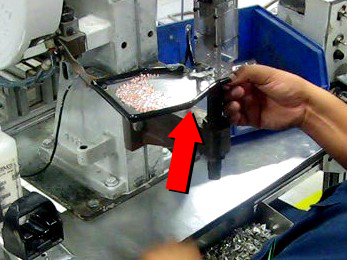
| Trays used to slide small parts into place on machines | |
The two examples above show use of small trays to simplify the handling of tiny parts. The trays are installed immediately adjacent to the point of use, so the parts can be slid into place without the need to pick up and put down.
 |
| Cutout |
A cutout in the side of a parts bin makes access easier. Also, sloped bins can make access easier (as compared to right-angled sides).
 |
 |
| Good arrangement of parts bins | |
Parts should usually be arranged in a semi-circle of easy reach. The example above left show parts bins recessed flush with the work surface. Above right, the parts bins are mounted on arms (plus some in the center portion are recessed into the surface).
Parts Presenters
 |
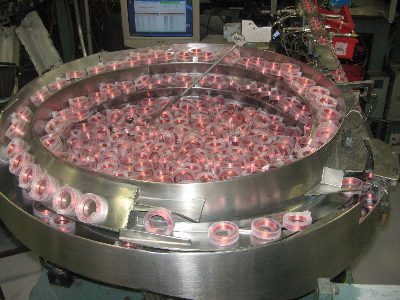 |
| Click for video clip: Screw presenter | Vibrator bowl feeder |
There is an overlap in terminology between “parts presenter” and “parts stands and bins.” The distinction is that “presenters” have moving mechanisms to help position or bring the parts close to the point of use.
Totally automated machines require the parts to be perfectly oriented for use, since the machine cannot select objects in a random location and orientation. Vibratory bowls provide a common way to orient parts for machines, but can also be used for manual workstations as well. (Note that vibratory bowls are often noisy and require noise enclosures when used near people.)
 |
 |
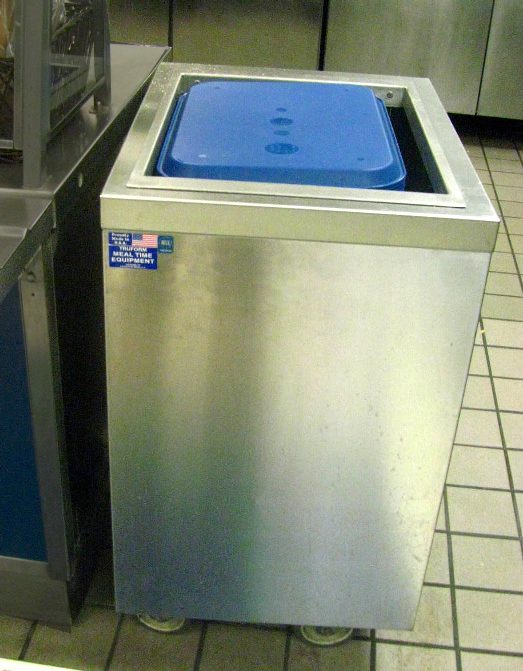
| Spring-loaded cafeteria tray dispenser | Spring-loaded parts dispenser integrated into workstation |
A vastly underutilized technique is spring-loaded dispenser. These dispensers have been long used in cafeterias for trays and plates, but only occasionally in assembly operations.
Holes in surface
 |
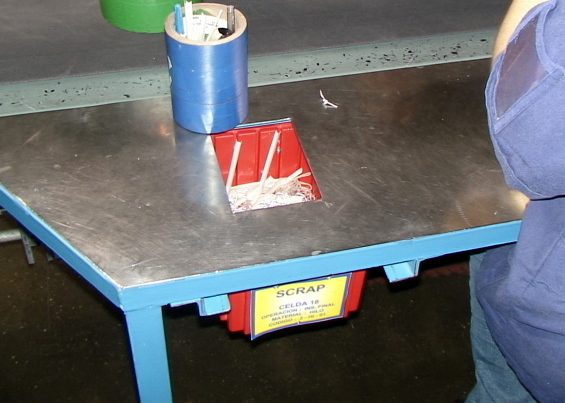 |
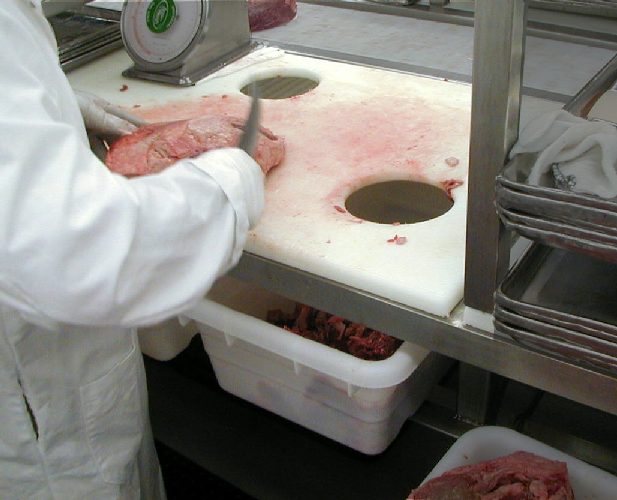
| Holes in meat cutting board | Hole for scrap |
An incredibly simple, but seldom used technique is cutting a hole in the work surface for completed items or scrap. This technique allows the items to be easily slid into a tote (on a holder installed underneath) rather than using time-consuming repetitive motions to pick up items and place them into a tote on the surface.
Orient for use
 |
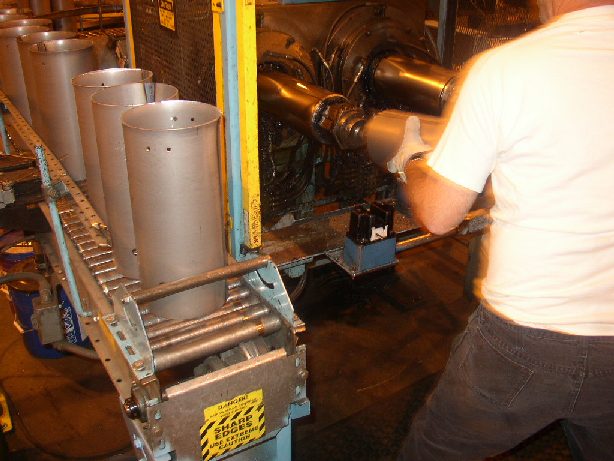 |
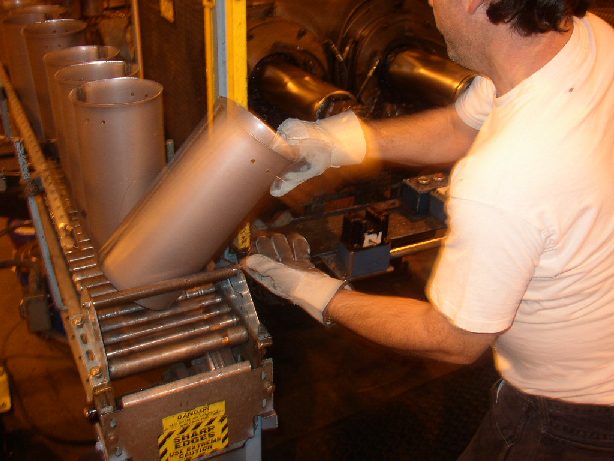
| Parts delivered in vertical orientation | Machine requires horizontal orientation |
A common problem is that parts are fed to workstations in an orientation different from that needed for use. Thus, the first step of a work cycle is to orient the object properly. In some situations, these unnecessary motions can amount to a significant waste of time as well as increasing the risk for repetitive motion disorders.
In the example above, the parts are delivered in one orientation, but used in another. Not shown is that the parts are subsequently returned to the takeaway conveyor vertically. These wasted motions combined to create shoulder problems, plus accounted for about 12% of cycle time. If the parts were delivered horizontally, a conveyor or slide could be added which would deliver the parts directly to the machine in the correct orientation, thus eliminating the wasted step.
Part Holders
 |
 |
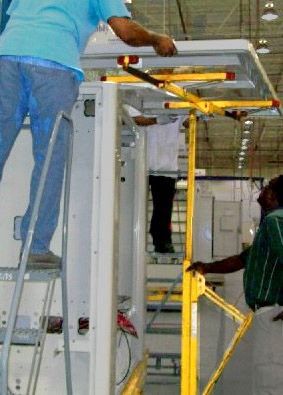 |
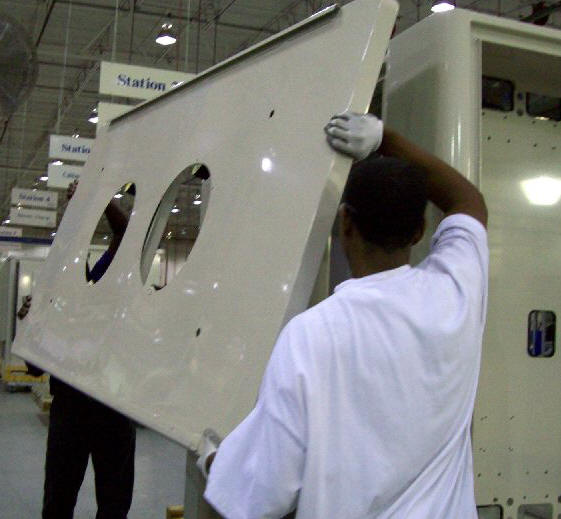
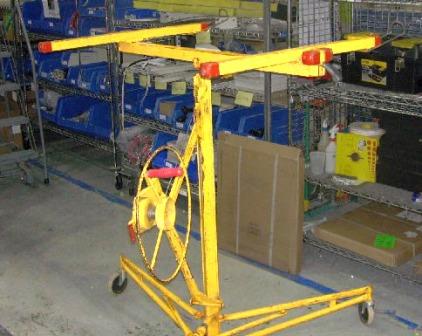
| Before: Manual lift, heavy panel | Drywall lift | After: Drywall lift to hold panel |
Some parts need to held in place as they are secured. Fixtures usually provide this function but occasionally other devices can be used. A good example is a drywall lift, normally used in building construction to raise and hold the drywall in position as it is nailed in place. Drywall lifts can be used in assembly operations as well, such as for supporting large sheets and flat panels of different types. However, the concept is broader than holding sheet rock and includes devices of almost any size and shape.